Wednesday, May 12, 2010

Last Few Weekends

Here are some pictures of the work I have done on Vixen for the last few weeks. There is progress, regardless of how slow it may seem to me and possibly others.
Luckily I have two VX800 radiators. One radiator was full of tar and sand from its midpoint down. Using heat and tar remover, it could be cleaned but there was some concern about the sand grating against the Aluminum and causing tiny leaks. So, I chose the one that had bent fins and was missing a bit of paint. The fins were tedious to straighten but was certainly not difficult.


Here are the results of the radiator work. Everything was scrubbed down, the radiator checked for leaks and the two temperature sensors tested. I did think about painting it a flat black but decided it was not necessary. If it is needed later on, the radiator is quite easy to remove.

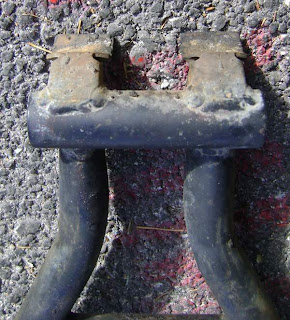
And, I finished rebuilding the foot pegs and mounts. The shields and pegs were cleaned, primed and painted with engine enamel. Both pegs received fresh pins, washers and a little Lithium grease.

And so, this weekend? Who knows.

Thursday, April 15, 2010

Long Time, No Blog

Life has indeed been busy. My place of employment is moving offices, I am now a 'most-of-the-time' telecommuter and several unexpected expenses have all conspired against my rebuild project. The last two weeks have minimally offered time to work on my project. If all holds, this weekend will be the same; several hours of garage time.

Through my stolen moments in the garage, the swing arm has been mounted, steering bearings replaced, fork mounted, carburetors mostly cleaned and both engines torn down to where parts can be cleaned, evaluated and reassembled.

Don't worry, there will be plenty of pictures.

kodabigpup sent a comment on my previous post:
"nice bike, i have one also...
i have a question for you, i am trying to replace my ignition switch but, i cant figure it out, is it a special tool to take off the nuts off the bottom of the ignition? i dont want to strip the ones on there currently.
"

Unfortunately, according to the service manual, the ignition switch cannot be replaced without breaking things. That is the way they designed it, likely as a theft deterrent. In Las Vegas, locksmiths charge nearly $60 for a re-key. This may be a possible option if the ignition/key switch is in acceptable and operable condition.

Saturday, February 13, 2010

Instrument Panel Done and Tested!

And here are the "after" pictures of my VX's instrument panel. The metal bracket was stripped, primed with self-etching primer several times and then hit with several coats of Rust-oleum flat black.
All screws, washers and nuts were cleaned on a wire wheel. The plastic housing was carefully cleaned, roughed up with 120 grit sandpaper and hit with several coats of primer. After a good period of drying, several coats of black were applied. All bulbs were tested individually while out of the harness. Luckily only three large bulbs and one small bulb needed to be replaced. Only $10 at my local neighborhood Nevada Suzuki.

Just before putting the whole thing back together, everything was cleaned. Apparently several families of spiders had made this their home. My old toothbrush did wonders.

Everything was put in place to test fitment. After a minor adjustment or two to the home-brew gauge gaskets, everything was closed and bolted tight.

Then, after nearly going blind trying to read a rather poor copy of the electrical layout, the instrument panel wiring tested 100%!

Ah, but I didn't stop there. I also mounted the repainted brace and front fender to the forks. All mounting bolts are new and I increased the height of the brace as much as possible by adding washers. Several folks suggested I consider a more multi-purpose tire for where I want to take her. That requires a little extra clearance. Hopefully this will do. That is as high as she will go without doing some work on the fender.

And last night the battery box was mounted to the frame. What a pain in the ass! It did NOT want to go in there. After a little scraped red paint, the battery box was in place.
Until the swing arm bearings are replaced, nothing else is going on the frame. Nevada Suzuki will be removing and replacing the steering head bearings and rear swing arm bearings as soon as I get them. No way do I want to put a partially built-up frame in the back of my pickup.

So... Looks like the carburetors are next on my list.

Monday, February 1, 2010

Instruments (Before)

Life has been busy, and evenings too cold to do much. That not withstanding, the instrument cluster has been disassembled and is in the process of being cleaned and repainted. The foam rubber pieces, instrumentation vibration dampener and a few bulbs need to be replaced. If all goes well, the instrument cluster parts should here by Friday and it should be back together this weekend.

This is not a picture of my VX800 instrument cluster; this was located on the internet some where. This weekend, the 'After' picture.

Saturday, January 30, 2010

Picture Update - Damned Paint and Bearings!

I knew the time would come when I needed to order parts. That time arrived last weekend. The front forks and steering stem was removed from V2, scrubbed, cleaned, inspected and mounted on V1.

After a bit of testing, reading, evaluation and asking about it on the VX800 e-mail list, the decision was made to replace the bearings. There was a 'notch' in the steering motion at about the one-o'clock position. Apparently this is not uncommon on these bikes and indicates that the bearings need to be replaced ASAP.

A fellow VX800 owner and wrencher suggested AllBalls for a steering bearing kit. They are fairly inexpensive and they have a good reputation. The local AutoZone had Timkens for about $30 each that would work and the local Suzuki shop had them for about $40 each. Both of them from AllBalls were about $40.

About Wednesday evening I decided to mount the swingarm. Well, the bearings need to be replaced there as well. Can't get them from AllBalls or AutoZone, so, will likely get them from Babbits.

Last weekend I also took apart the instrumentation panel to clean and repaint it. Must have really ticked off a few family of spiders!

There are a few bulbs that need to be replaced and some rubber seals but overall, the entire instrumentation unit looks solid.

Now, one thing I want to say about the paint... I picked the Duplicolor Victory Red for the frame. Under it is the recommended primer. Over it is the recommended clear-coat; Duplicolor Truck and SUV ClearCoat. This morning I spent some time trying to figure out how the battery box should go in. Well, in the course of this little three dimensional puzzle play, the battery box lightly scraped the frame. Off comes the paint.

Luckily, this is a fairly hidden spot, and the underlying frame paint held up. It was still irritating to see how fragile this paint job is. Next time, if there is a next time, red powder coat all the way. Last year I received a quote of $325 for all red. Should have done it. Maybe it is not always a good idea to scrimp and save when doing a motorcycle restoration.

Off to wrench for the weekend!

Friday, January 22, 2010

Why Red?

A few people asked why I went with the color red. The answer may sound odd, but here it is.

My favorite aviary animal is the Red Winged Blackbird. Even before I started riding about two years ago, the idea of having a bike styled after this bird was tumbling around in my mind. After purchasing my first VX800 about a year ago, there was no question how it would be styled. The specifics though, where still up in the air.

Several thoughts tumbled around in my brain... All black with red side stripes? All black with a red engine? There was definitely some uncertainty.

After getting her apart and ready to paint, there was one way to go... All flat black with a red frame. Luckily my second VX, the donor bike is black so picturing it in my mind was a little easier.

There are still some styling questions in my mind, but I am certain that when the time comes, it will all come together.

Monday, January 18, 2010

Just A Few Sneak Peeks.

OK, for those visually stimulated folks...

Center Stand Before Cleaning

Center Stand After Cleaning, Wire Wheel, Sanding, Priming (two coats) And Three Coats of Dupli-Color Flat Black

Frame After Cleaning (3 or four times), Wire Brush, Sanding, Primer (three coats), Dupli-Color GM Victory Red (three coats) and Dupli-Color Truck and SUV Clear Coat (three coats)