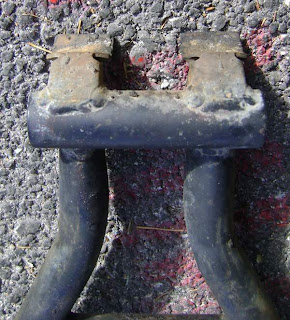
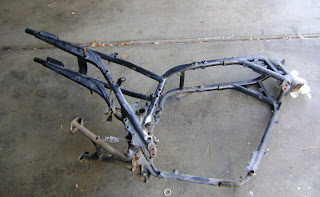
I knew the time would come when I needed to order parts. That time arrived last weekend. The front forks and steering stem was removed from V2, scrubbed, cleaned, inspected and mounted on V1.
After a bit of testing, reading, evaluation and asking about it on the VX800 e-mail list, the decision was made to replace the bearings. There was a 'notch' in the steering motion at about the one-o'clock position. Apparently this is not uncommon on these bikes and indicates that the bearings need to be replaced ASAP.
A fellow VX800 owner and wrencher suggested AllBalls for a steering bearing kit. They are fairly inexpensive and they have a good reputation. The local AutoZone had Timkens for about $30 each that would work and the local Suzuki shop had them for about $40 each. Both of them from AllBalls were about $40.
About Wednesday evening I decided to mount the swingarm. Well, the bearings need to be replaced there as well. Can't get them from AllBalls or AutoZone, so, will likely get them from Babbits.
Last weekend I also took apart the instrumentation panel to clean and repaint it. Must have really ticked off a few family of spiders!
There are a few bulbs that need to be replaced and some rubber seals but overall, the entire instrumentation unit looks solid.
Now, one thing I want to say about the paint... I picked the Duplicolor Victory Red for the frame. Under it is the recommended primer. Over it is the recommended clear-coat; Duplicolor Truck and SUV ClearCoat. This morning I spent some time trying to figure out how the battery box should go in. Well, in the course of this little three dimensional puzzle play, the battery box lightly scraped the frame. Off comes the paint.
Luckily, this is a fairly hidden spot, and the underlying frame paint held up. It was still irritating to see how fragile this paint job is. Next time, if there is a next time, red powder coat all the way. Last year I received a quote of $325 for all red. Should have done it. Maybe it is not always a good idea to scrimp and save when doing a motorcycle restoration.
Off to wrench for the weekend!
Saturday, January 30, 2010
Friday, January 22, 2010
Why Red?
A few people asked why I went with the color red. The answer may sound odd, but here it is.
My favorite aviary animal is the Red Winged Blackbird. Even before I started riding about two years ago, the idea of having a bike styled after this bird was tumbling around in my mind. After purchasing my first VX800 about a year ago, there was no question how it would be styled. The specifics though, where still up in the air.
Several thoughts tumbled around in my brain... All black with red side stripes? All black with a red engine? There was definitely some uncertainty.
After getting her apart and ready to paint, there was one way to go... All flat black with a red frame. Luckily my second VX, the donor bike is black so picturing it in my mind was a little easier.
There are still some styling questions in my mind, but I am certain that when the time comes, it will all come together.
Monday, January 18, 2010
Just A Few Sneak Peeks.
BUSY! Update soon!
Yes, there are some pictures on my camera, however, this past weekend was focused more on 'doing' than 'documenting.' And doing is what I did.
Starting last Friday night, inventory was taken and plans made. Before the end of the weekend I was determined to completely paint the frame. So a supply list was made.
Early Saturday morning the motorcycle frame was scrubbed with warm soapy water, wirebrushed ad rinsed. After a few cycles of that, the frame was hung by heavy wire to the garage rafters so it could dry while I ran out to get painting supplies.
This is where a mistake was discovered. The color I wanted is called "Ford Cardinal Red" by Duplicolor. It only comes in the smaller 5 ounce touch-up paint size cans, and costs nearly $8. As a matter of fact, three cans were previously purchased and used to paint the kick stand, passenger handles and a few other pieces.
Well, after visiting Pep-Boys, Auto Zone and Checkers, the reality of my mistake was clear. It was a two fold mistake. #1) The paint color is not widely available here in Las Vegas. Apparently luck was the only reason I found the three cans. The color was order only from all three auto parts stores. #2) The touch-up size does not cover very much area. That seems obvious now, but not so much before.
Economy of a different color choice made sense. So, a color called 'GM Victory Red' was selected. It costs only $6.50 for a large can and is nearly the same shade as 'cardinal red.'
The remainder of the day was spent sanding with 400 grit wet paper, wiping down the frame and cleaning any nooks and crannies that had been missed before with a tooth brush. The center stand was also finished in a fantastic and durable matte black and hung up.
Sunday morning start was early. After plugging all of the bolt holes in the frame with wads of shop towel and masking off other parts, the whole things was sprayed with three coats of Dupli-Color Sealer Primer. Some spots where there had been rust, received a coat of self-etching primer before the sealer primer.
While waiting between coats, I cleaned up the rear swing arm and rear wheel. By the end of the day, the rear wheel was nearly ready to have the driven gear re-installed.
After the prerequisite primer dry time, the painting started; two thin coats and one 'wet' coat. Just before finishing the second thin coat, the can goes empty. After a quick run to Auto Zone, Paint was flying again.
Painting odd shapes with a rattle-can is easy. Avoiding runs and under-painted surfaces is the hard part. My little VX800 frame has some runs and is not glass smooth but is fairly tough.
After being thoroughly cleaned, sanded and masked, the rear swingarm was given a coat of self-etching primer where necessary and then two coats of sealer primer. After that, it was covered with several coats of Dupli-Color matte black.
And then, after everything is hanging in the garage, curing, something is discovered. While drinking a glass of Merlot, examining my handiwork, several underpainted spots on the frame and a few on the swingarm were found.
DAMN!
The swingarm fix was simple; just an extra coat. The repair for the frame will be a bit more complex. The low paint areas will need to be wet sanded down a bit, then more red paint and then more clear coat. Honestly not too painful.
So... Next weekend, maybe even this week, rebuilding begins!
And, not to worry. pictures coming soon.
While
Friday, January 8, 2010
Restoration Dead Ahead! Painting Has Begun!
At approximately 8 PM last night, Vixen was officially moving in the direction of a restoration. After an hour and 30 minutes or so of paint stripping and polishing and washing and sanding, the left and right passenger grip bars and the rear brake caliper support rod were ready.
And, after laying down two coats of Dupli-Color Self Etching Primer and a coat of Dupli-Color Cardinal Red, here are the results.
There are flaws; I am just a beginner and that's OK. There are a few spots where the coverage was quite weak and the primer is still showing. On one grip there was a small drip at the very bottom. And on the other grip, the thin wire I used to hang it as I painted, caused a small mark.
In all, not bad for a very first time.
Tonight, another coat of red. Saturday, maybe another red but definitely finishing them up with some clear coat.
Wednesday, January 6, 2010
Few Pragmatic Alterations
Selected parts of frame and other pieces sit patiently in the garage. Whether they know it or not, they are waiting for a good solvent scrubbing, a little rough play with some sand paper, a few coats of primer, few colored undercoats and a few layers of clear coat.
Perhaps it is my cold, or maybe my cabin fever, but more and more of those desert gravel roads seem to call out. My VX800 lays in pieces, promising a few good long rides on that gravel.
So, what the hell am I thinking? Why am I thinking of cool finishes and spending time researching just the right flat black? There are innumerable stretches of asphalt and gravel and trails that the two of us could go. She doesn't NEED a brilliant, perfect red frame and wheels. She doesn't NEED a flat black engine. She doesn't NEED a flawless black finish on her tank and plastic pieces.
She NEEDS to be rideable. There may be some pragmatism going on here, a little give and take to get her moving soon. That's OK. I am more than willing to pass on the flat black engine and perfect tank in exchange for a bike that will tear up the twisties and chew on gravel for breakfast. And, she will look good doing it; promise.
Tuesday, January 5, 2010
A Little Cold Will Not Keep Me From Wrenching
Yes, I have a cold. My head hurts, body aches, got very little sleep last night and breathing through my nose is an experience only to be attempted with tissues in the immediate vicinity.
But, that didn't keep me from a little wrenching tonight.
While a cup of tea was brewing, I ventured out into the chilly garage, made even more cold by a slight fever. The next phase of work is to prepare and paint the frame, swing arm and rear drive. If all goes well this weekend, the swing arm and smaller ancillary parts of the frame should be ready for clear coat, or perhaps ready to cure for a week before another undercoat and then clear. Who knows.
One thing on my list was to determine which rear wheel to use. After last weekend's rear wheel extraction from V2, at least one new bearing would be necessary to use that rear wheel. The question remained unanswered; are the bearings on V1's wheels OK?
So, as my tea brewed and I shivered, following the service manual, a few rough checks of V1's rear wheel bearings were made. And... We have a winner. V1's rear wheel bearings are in fine shape.
So, as I curl up in a blanket, drinking my hot tea, wishing for a nice back and shoulder rub, the gears are still moving.
Sunday, January 3, 2010
A Little Wrenching on the Clutch and Rear Wheel
After a tool failure while attempting to adjust the clutch on my Sporty, there was only one thing to do... Wrench on Vixen.
Two things were left on my list for today; remove and inspect V2's clutch and remove the rear wheel. The clutch came out with no problem at all.
Now, this rusty main crank drive gear may be an issue, but luckily I have a spare.
Clutch is out, so now my attention is turned to the rear wheel. The goal of the day for this part is to remove the wheel and it's driven gear.
BUT, the rusty rear axle has quite firmly attached itself to one of the rear wheel's bearings. (Poor picture, I know)
So, after soaking it with penetrating oil for about an hour and removing the brake caliper, a little nudging is used. A socket extension is placed through the wheel and placed against the end of the axle. After more than a few hits with this heavy rubber mallet (and a small ball peen hammer), something comes loose.
Yes, something came loose. Apparently the rusty rear axle had a better grip on that bearing than I thought. The bearing came out of the wheel!
But, the wheel did come off and the bearing is ruined. Not sure if it is due to my removal or whether it was bad in the first place. That was enough for the day.
Final Finishing Choices
While waiting for my garage to warm up and lamenting the fact I had not brought home my space heater from work, there was time for researching. Motorcycle restoration seems to be quite varied and non-specific. There is no help site, directing the seeker to use this particular primer, or that brand of top coat, or the other method of surface prep. Most of the information on the internet dealing with this topic is subjective.
Some go all out and use high-tech chemicals and methods to clean their parts down to raw molecular metal and then slowly and carefully build up the primer level, under coat and finally clear coat, with the attention and skill of a brain surgeon. Others rough up the surface with a little 100 grit sand paper and blow on a few coats of color with a rattle can. For that matter, some do not use the sandpaper.
It seems to me that motorcycle finishing, and general motorcycle restoration has few rules and proven methods. So, here is what will happen to my little project.
Firstly, all metal surfaces will be stripped of its finish with Rustoleum Aircraft Remover. Rusted iron surfaces will be treated with an appropriate treatment or conversion chemical. Rust treatment has not been decided completely yet.
After the engine is stripped, all parts, including cylinders, heads, case and covers will be coated with one or two layers of PJ1 satin/flat black engine paint. This product receives decent reviews, is a nice satin/flat black, has been recommended to me by local dirt-bike riders and is fairly durable.
Immediately after the frame, swing arm, wheels, tank, plastic and other surfaces are stripped or otherwise prepared, One or perhaps two layers of Dupli Color Self-Etching primer will be used.
All frame parts, swing arm and wheels will be painted with several layers of Dupli Color Ford Cardinal Red.
After the red parts are completed, one of more coats of U-POL Clear #1 clear coat will be applied. It receives fairly good reviews and offers decent UV protection.
The main bike paint has been found!!! Well, technically anyway. How did I know John Deere would be involved? Here is a photo of a scooter painted in John Deere Blitz Black. It is inexpensive, tough & durable, and receives many great reviews from hot-rod auto builders. Plus, that is the exact finish I want.
OK, hopefully it is warm enough for me to do some work in the garage.
Saturday, January 2, 2010
Frame Color Has Been Located!
And, it was at my favorite auto parts store, AutoZone.
While poking around at a few local auto and paint stores, a certain red just popped out at me; Ford Cardinal Red. It is not a 'use sunglasses to look at me' sort of red, but quite bright and noticeable. AutoZone has the DupliColor etching primer and the color available in rattlecans. Now, all I need is a good hard clear coat.
Here is a picture that fairly well replicates the color.
So, the frame, engine support, swing arm and wheels will be painted this color.
Also located a place here that carries PJ1 High Temperature Flat Black Engine Paint. The local Cycle Gear offers a large rattle can for only $9. So, in all, research progress is moving nicely.
Parts and Project Bike Search Help
Anyone working on a car or motorcycle rebuild or restoration should know about this little tool. It is the Jaxed CraigsList and E-Bay mash and search page. This nifty little tool lets you search by brand, location and a free text filter.
Now, the search works very well against the CraigsList site. If no location is entered, ALL CraigsList locations are searched. That functionality gives a person working on a motorcycle restoration a real advantage when searching for parts, pieces and bikes that are no longer available or far too expensive.
Just click here to browse to the Jaxed search page.
As good as the CraigsList search is, the E-Bay search seems just as bad. Going to E-Bay and searching for Suzuki VX800 yeilds quite a few itemes. The Jaxed page shows nothing. Maybe I am just missing something.
The Jaxed mash searches not only CraigsList and E-Bay but also kijiji.
In all, this combinatiotion search page and mash gets a 3.5 out of 5 thumbs up. If the E-Bay search worked better, it would definitely be worth 5.
Friday, January 1, 2010
For Those Visualy Stimulated Folk
While performing this little rebuilding project, as time and light permit, I have been snapping some photos. Right now I am preparing to strip and paint the frame of the first VX800 and a few other key items. In general the frame and key support items from the first motorcycle is in better shape and almost completely rust-free. The other VX800 (the one from California) has some surface rust from the more humid, salty air. SO, those are the items photographed... go figure.
Subscribe to:
Posts (Atom)